在这篇教程里,我们来学习使用 Asset Manager 加载3d模型和文字到场景图,还会学习如何确定路径和文件格式。
找不到运行需要的文件? 要想获得这个教程里的游戏资源(3d模型),添加 |
Code Sample
package jme3test.helloworld;
import com.jme3.app.SimpleApplication;
import com.jme3.font.BitmapText;
import com.jme3.light.DirectionalLight;
import com.jme3.material.Material;
import com.jme3.math.Vector3f;
import com.jme3.scene.Geometry;
import com.jme3.scene.Spatial;
import com.jme3.scene.shape.Box;
/** 例子 3 - 如何加载OBJ模型和OgreXML模型,
* 材质/贴图,或文字 */
public class HelloAssets extends SimpleApplication {
public static void main(String[] args) {
HelloAssets app = new HelloAssets();
app.start();
}
@Override
public void simpleInitApp() {
Spatial teapot = assetManager.loadModel("Models/Teapot/Teapot.obj");
Material mat_default = new Material(
assetManager, "Common/MatDefs/Misc/ShowNormals.j3md");
teapot.setMaterial(mat_default);
rootNode.attachChild(teapot);
// 创建墙壁。墙壁使用了test_data里的一张贴图
Box box = new Box(2.5f,2.5f,1.0f);
Spatial wall = new Geometry("Box", box );
Material mat_brick = new Material(
assetManager, "Common/MatDefs/Misc/Unshaded.j3md");
mat_brick.setTexture("ColorMap",
assetManager.loadTexture("Textures/Terrain/BrickWall/BrickWall.jpg"));
wall.setMaterial(mat_brick);
wall.setLocalTranslation(2.0f,-2.5f,0.0f);
rootNode.attachChild(wall);
// 用默认字体显示一行文字
guiNode.detachAllChildren();
guiFont = assetManager.loadFont("Interface/Fonts/Default.fnt");
BitmapText helloText = new BitmapText(guiFont, false);
helloText.setSize(guiFont.getCharSet().getRenderedSize());
helloText.setText("Hello World");
helloText.setLocalTranslation(300, helloText.getLineHeight(), 0);
guiNode.attachChild(helloText);
// 从test_data加载模型(OgreXML + 材质 + 贴图)
Spatial ninja = assetManager.loadModel("Models/Ninja/Ninja.mesh.xml");
ninja.scale(0.05f, 0.05f, 0.05f);
ninja.rotate(0.0f, -3.0f, 0.0f);
ninja.setLocalTranslation(0.0f, -5.0f, -2.0f);
rootNode.attachChild(ninja);
// You must add a light to make the model visible
DirectionalLight sun = new DirectionalLight();
sun.setDirection(new Vector3f(-0.1f, -0.7f, -1.0f));
rootNode.addLight(sun);
}
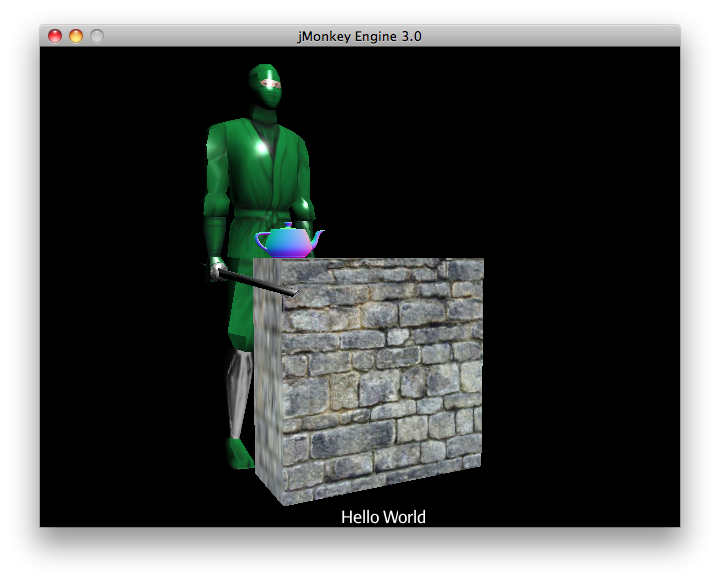
}编译和运行示例代码。你应该看到绿色的忍者站在放着彩色茶壶的墙壁后。屏幕的文字应该是"`Hello World`"。
资源管理器(The Asset Manager)
*游戏资源指的是多媒体文件,比如模型,材质,贴图,场景,shaders,音乐音频文件和字体。*JME3自带资源管理器(AssetManager)来帮助你使用资源。 资源管理器可以从这些路径获取资源:
当前所在路径(项目的根目录)
assets所在的路径可选,自定义路径
以下是推荐的项目目录结构:
我的游戏(MyGame)/assets/
MyGame/assets/Interface/
MyGame/assets/MatDefs/
MyGame/assets/Materials/
MyGame/assets/Models/       <--  .j3o 模型文件
MyGame/assets/Scenes/
MyGame/assets/Shaders/
MyGame/assets/Sounds/       <-- 音频文件
MyGame/assets/Textures/     <-- 贴图
MyGame/build.xml            <-- Ant build script
MyGame/src/...              <-- java源代码
MyGame/...这只是推荐,也是你在jMonkeyEngineSDK创建新项目后默认的结构。你可以创建 assets 目录然后对子目录命名想要的目录名。
加载贴图
把贴图放到 assets/Textures/ 目录里。在给空间体设定材质前加载贴图。以下实例代码放在 simpleInitApp() 函数里。它加载一个简单的墙壁模型:
// 用test_data库里的贴图创建一面墙壁
Box box = new Box(2.5f,2.5f,1.0f);
Spatial wall = new Geometry("Box", box );
Material mat_brick = new Material(
    assetManager, "Common/MatDefs/Misc/Unshaded.j3md");
mat_brick.setTexture("ColorMap",
    assetManager.loadTexture("Textures/Terrain/BrickWall/BrickWall.jpg"));
wall.setMaterial(mat_brick);
wall.setLocalTranslation(2.0f,-2.5f,0.0f);
rootNode.attachChild(wall);在这个案例中,你创建了自己的材质并将其应用到一个Geometry上。如上例所示,该材质基于默认的材质描述文件(诸如 “Unshaded.j3md”)而创建。
加载文字和字体
这个实例会在窗口底部显示默认字体的 “Hello World” 文字。把文字绑定到 guiNode - 这是一个特别的节点,它以平面(正交)的形式来显示个体。比如,文字来显示游戏得分,生命值等。
以下代码放在 simpleInitApp() 函数里。
// 用默认字体显示一行文字
guiNode.detachAllChildren();
guiFont = assetManager.loadFont("Interface/Fonts/Default.fnt");
BitmapText helloText = new BitmapText(guiFont, false);
helloText.setSize(guiFont.getCharSet().getRenderedSize());
helloText.setText("Hello World");
helloText.setLocalTranslation(300, helloText.getLineHeight(), 0);
guiNode.attachChild(helloText);
通过给guiNode上的所有个体解除绑定来取消现有文字的显示。 |
加载模型
导出3d模型到OgreXML格式 (.mesh.xml, .scene, .material, .skeleton.xml) 然后把它们放到 assets/Models/ 目录里。
以下代码放在 simpleInitApp() 函数里。
// 从test_data库加载一个模型(OgreXML + 材质 + 贴图)
Spatial ninja = assetManager.loadModel("Models/Ninja/Ninja.mesh.xml");
ninja.scale(0.05f, 0.05f, 0.05f);
ninja.rotate(0.0f, -3.0f, 0.0f);
ninja.setLocalTranslation(0.0f, -5.0f, -2.0f);
rootNode.attachChild(ninja);
// You must add a directional light to make the model visible!
DirectionalLight sun = new DirectionalLight();
sun.setDirection(new Vector3f(-0.1f, -0.7f, -1.0f).normalizeLocal());
rootNode.addLight(sun);| 如果导出的模型带有材质,你不需要再创建材质。记得加上光源,不然会看不见材质(整个模型) |
从自定义路径加载资源
如果你的游戏依赖于用户提供模型文件。这些文件不在发布的文件里。该怎么办呢?如果文件不在默认目录(比如, assets 目录),你可以登记一个自定义Locator然后从任何目录加载。
Here is a usage example of a ZipLocator that is registered to a file town.zip in the top level of your project directory:
以下例子使用了ipLocator。它登记了项目根目录的 town.zip 文件。
    assetManager.registerLocator("town.zip", ZipLocator.class);
    Spatial scene = assetManager.loadModel("main.scene");
    rootNode.attachChild(scene);
以下例子是HttpZipLocator。它可以通过网络下载zip压缩的模型然后加载它们。
    assetManager.registerLocator("https://storage.googleapis.com/"
            + "google-code-archive-downloads/v2/code.google.com/"
            + "jmonkeyengine/wildhouse.zip", HttpZipLocator.class);
    Spatial scene = assetManager.loadModel("main.scene");
    rootNode.attachChild(scene);
JME3提供ClasspathLocator,ZipLocator,FileLocator,HttpZipLocator和UrlLocator(详情见 com.jme3.asset.plugins)。
创造模型和场景
要创造模型和场景,首先需要有3d网格编辑器(建模软件)。如果没有这些工具,推荐使用Blender然后安装上OgreXML Exporter插件(译者(wchen):如果使用JME SDK的话是可以直接导入blender格式的模型,就不需要安装插件了)。 然后 创造带贴图的模型 (比如用Blender) 和导出到项目里。 然后使用 SDK 点击 load models, convert models, 和 create 3D scenes 。
详情了解 创造模型和场景 作为例子关于导出模型到带材质的Ogre XML格式。
模型文件格式
JME3 可以转换和导入
Ogre XML 模型 + 材质.
Ogre DotScenes.
Wavefront OBJ + MTL 模型.
.Blend 文件.
当你直接在SDK运行代码, loadModel() 可以加载这些文件格式。如果你用默认build script编译成可执行文件,这些原文件(XML, OBJ, 等)是不被包含的 。所以,当你在SDK外运行,然后直接导入这些模型,你会得到以下报错:
com.jme3.asset.DesktopAssetManager loadAsset
WARNING: Cannot locate resource: Models/Ninja/Ninja.mesh.xml
com.jme3.app.Application handleError
SEVERE: Uncaught exception thrown in Thread[LWJGL Renderer Thread,5,main]
java.lang.NullPointerException
可以发现直接加载 XML/OBJ/Blend 文件 ,只有在SDK开发阶段可以。比如,每次你的美术设计师更新文件到asset路径,你可以很快得在开发环境中查看最新版本。
但是对于QA(质量保证)测试和最终版本,应该只使用 .j3o 文件 。 J3o是针对JME3应用优化的二进制格式。当你做QA测试或最终版本,使用 SDK 来 转换 所有 .obj/.scene/.xml/.blend 文件到 .j3o 文件,然后更新所有代码到加载 .j3o 文件。默认build script自动打包 .j3o 文件到可执行文件。
在jMonkeyEngine SDK打开你的JME3xiangmu。
在Projects窗口,右键点击 .Blend, .OBJ, or .mesh.xml 文件,然后选择"`Convert to j3o Binary`"。
.j3o文件会用同样的名字生成在 .mesh .xml 文件旁。
更新所有你的
loadModel()代码, 比如:Spatial ninja = assetManager.loadModel("Models/Ninja/Ninja.j3o");
如果你的可执行程序throws “Cannot locate resource” runtime exception(运行异常),检查所有的加载路径和确保转换所有的模型到.j3o文件! |
加载模型和场景
| 问题? | 解决方法! |
|---|---|
加载模型 W/ 材质. | 用 asset manager 的 |
加载模型 W/O 材质. | 如果你的模型没有材质,你需要给它材质来让它可见 |
加载一个场景 | 加载场景跟加载模型一样 |
小测试 - 如何加载资源
作为测试,让我们尝试用不同方式加载场景。你会学到如何直接加载场景或从zip文件加载。
下载town.zip 实例场景.
(可选:)解压town.zip可以看到Ogre dotScene的格式:你会看到路径名叫
town。它包含 XML, 贴图,和main.scene 文件。 (这只是附加信息,你不需要对它作什么。)把twon.zip放到项目根目录,类似以下:
jMonkeyProjects/MyGameProject/assets/
jMonkeyProjects/MyGameProject/build.xml
jMonkeyProjects/MyGameProject/src/
jMonkeyProjects/MyGameProject/town.zip
...
用以下函数从zip文件加载模型:
确定
town.zip在项目根目录。登记zip file locator到项目根目录: 在
simpleInitApp()函数添加以下代码。assetManager.registerLocator("town.zip", ZipLocator.class); Spatial gameLevel = assetManager.loadModel("main.scene"); gameLevel.setLocalTranslation(0, -5.2f, 0); gameLevel.setLocalScale(2); rootNode.attachChild(gameLevel);loadModel()函数现在可以直接找到要加载的zip文件
(也就是说,不要写`loadModel(town.zip/main.scene)` 之类的!)编译然后运行项目
你应该看到忍者+墙壁+茶壶”站在”小镇上。
如果你登记了新的locators,确保你不会有重复文件名:不要命名所有场景 |
更早的时候,在这教程,你从asset路径加载了场景和模型。这是最普遍的方式加载场景和模型。这是另一种方式:
删掉之前测试里加的代码。
把解压的
town/路径放到项目里assets/Scenes/路径。在
simpleInitApp添加以下代码。Spatial gameLevel = assetManager.loadModel("Scenes/town/main.scene"); gameLevel.setLocalTranslation(0, -5.2f, 0); gameLevel.setLocalScale(2); rootNode.attachChild(gameLevel);注意这里的路径是相对于
assets/…路径的编译和运行项目
你将又一次看到忍者+墙壁+茶壶站在小镇上。
这是第三种方式,你必须知道的:从 .j3o 文件加载场景/模型:
删掉之前加的代码。
打开 SDK 然后打开HelloAsset的项目,如果你还没有这样做。
在projects窗口,找到
assets/Scenes/town路径。右键点击
main.scene然后转换场景到二进制: jMonkeyPlatform 会生成 main.j3o 文件在
simpleInitApp()函数添加以下代码 {`Spatial gameLevel = assetManager.loadModel("Scenes/town/main.j3o"); gameLevel.setLocalTranslation(0, -5.2f, 0); gameLevel.setLocalScale(2); rootNode.attachChild(gameLevel);同样,注意这里的路径是相对于
assets/…路径的编译和运行项目
你将再一次看到忍者+墙壁+茶壶站在小镇上。
总结
现在你知道如何添加形状和模型到场景图,和如何装换场景。你学会了如何通过 assetManager 加载加载资源和你发现了初始路径是项目的根目录。最后最重要的你知道了对于jar可执行文件,要转换模型到 .j3o 格式
下一章节 Update Loop ,我们将给场景添加动作
了解更多:
如果你想学习声音, 查看 Hello Audio
如果你想学习更多关于贴图和材质, 查看 材质